Log inoculation with sawdust spawn: tools and materials
Log inoculation with sawdust spawn: tools and materials
Background
This will be the first of probably 2 posts covering log inoculation from sawdust spawn. Log inoculation is a common technique for growing certain wood loving species such as shiitake. This is a nice activity to spend the day outdoors alone or makes a great group activity as well as there are discrete steps that lend themselves well to splitting work. An inoculation party could be a fun activity for a community garden for example, all you need is a reliably shady spot, some clean logs, and relatively inexpensive supplies to grow mushrooms for many years. You could also give away completed logs as gifts for friends.
Depending on the technique the finishing step may be different (shiitake gets log cabin like in the top pic, chestnuts, reiishi get buried etc) but the process starts the same way. Like all mushroom growing this is a probability game, you want to maximize the chances of your chosen mycelium colonizing the substrate and minimize the odds of competition, this is the same here. We will be drilling holes in healthy logs, injecting them with chestnut mushroom sawdust spawn, and sealing the wounds with edible wax.
Materials
- Clean logs

The best logs are from freshly cut trees, 3-6” in diameter and 6’ long on the high end. This is about the biggest size one can handle alone. Smaller is better for kids, or those with less lifting ability. The best time to fell trees is fall, but other seasons are fine too, I think. The main thing is to not let them sit too long, a month or so max. We are aiming for a sterile substrate, so the longer we wait the more competitors are introduced. Here I am using maple (as always) but depending on the species many hardwoods will work. The spawn supplier should be able to provide lists of compatible species.
- Sawdust spawn
This is a block of sawdust that has been inoculated with the species of your choice. This is available from retailers online. I like north spore personally but I am sure there are others. Sawdust spawn comes in 5 pound bags which should be enough to inoculate 10-15 logs depending on size. When it comes in the mail it’s important to use it right away. It can also be kept refrigerated for up to six months as it goes dormant.
- Wax
-Edible wax and something to melt it in. Emphasis on edible. Beeswax is a popular choice. I like using red cheese wax because it’s bright color lets me see what i have completed easily. Cut it into ~3cm chunks for easy melting. As a vessel here I used an old food can. Whatever you use will be covered in wax forever so disposable is best, though some people use dedicated crock pots for this. But you’d have to be doing a LOT of logs. As to quantity I bought a 5lb block from a cheese making supply store and it’s lasted me through 30 logs and will probably do more.
-A heat source. I am using a camping stove here, but a sterno, old crock pot, even a sous vide with the wax in a bag will work.
-Wax applicators. Anything absorbent will work, a small paint brush, maybe even cotton balls on sticks. The bespoke applicators are pretty cheap though and probably worth getting.
Tools
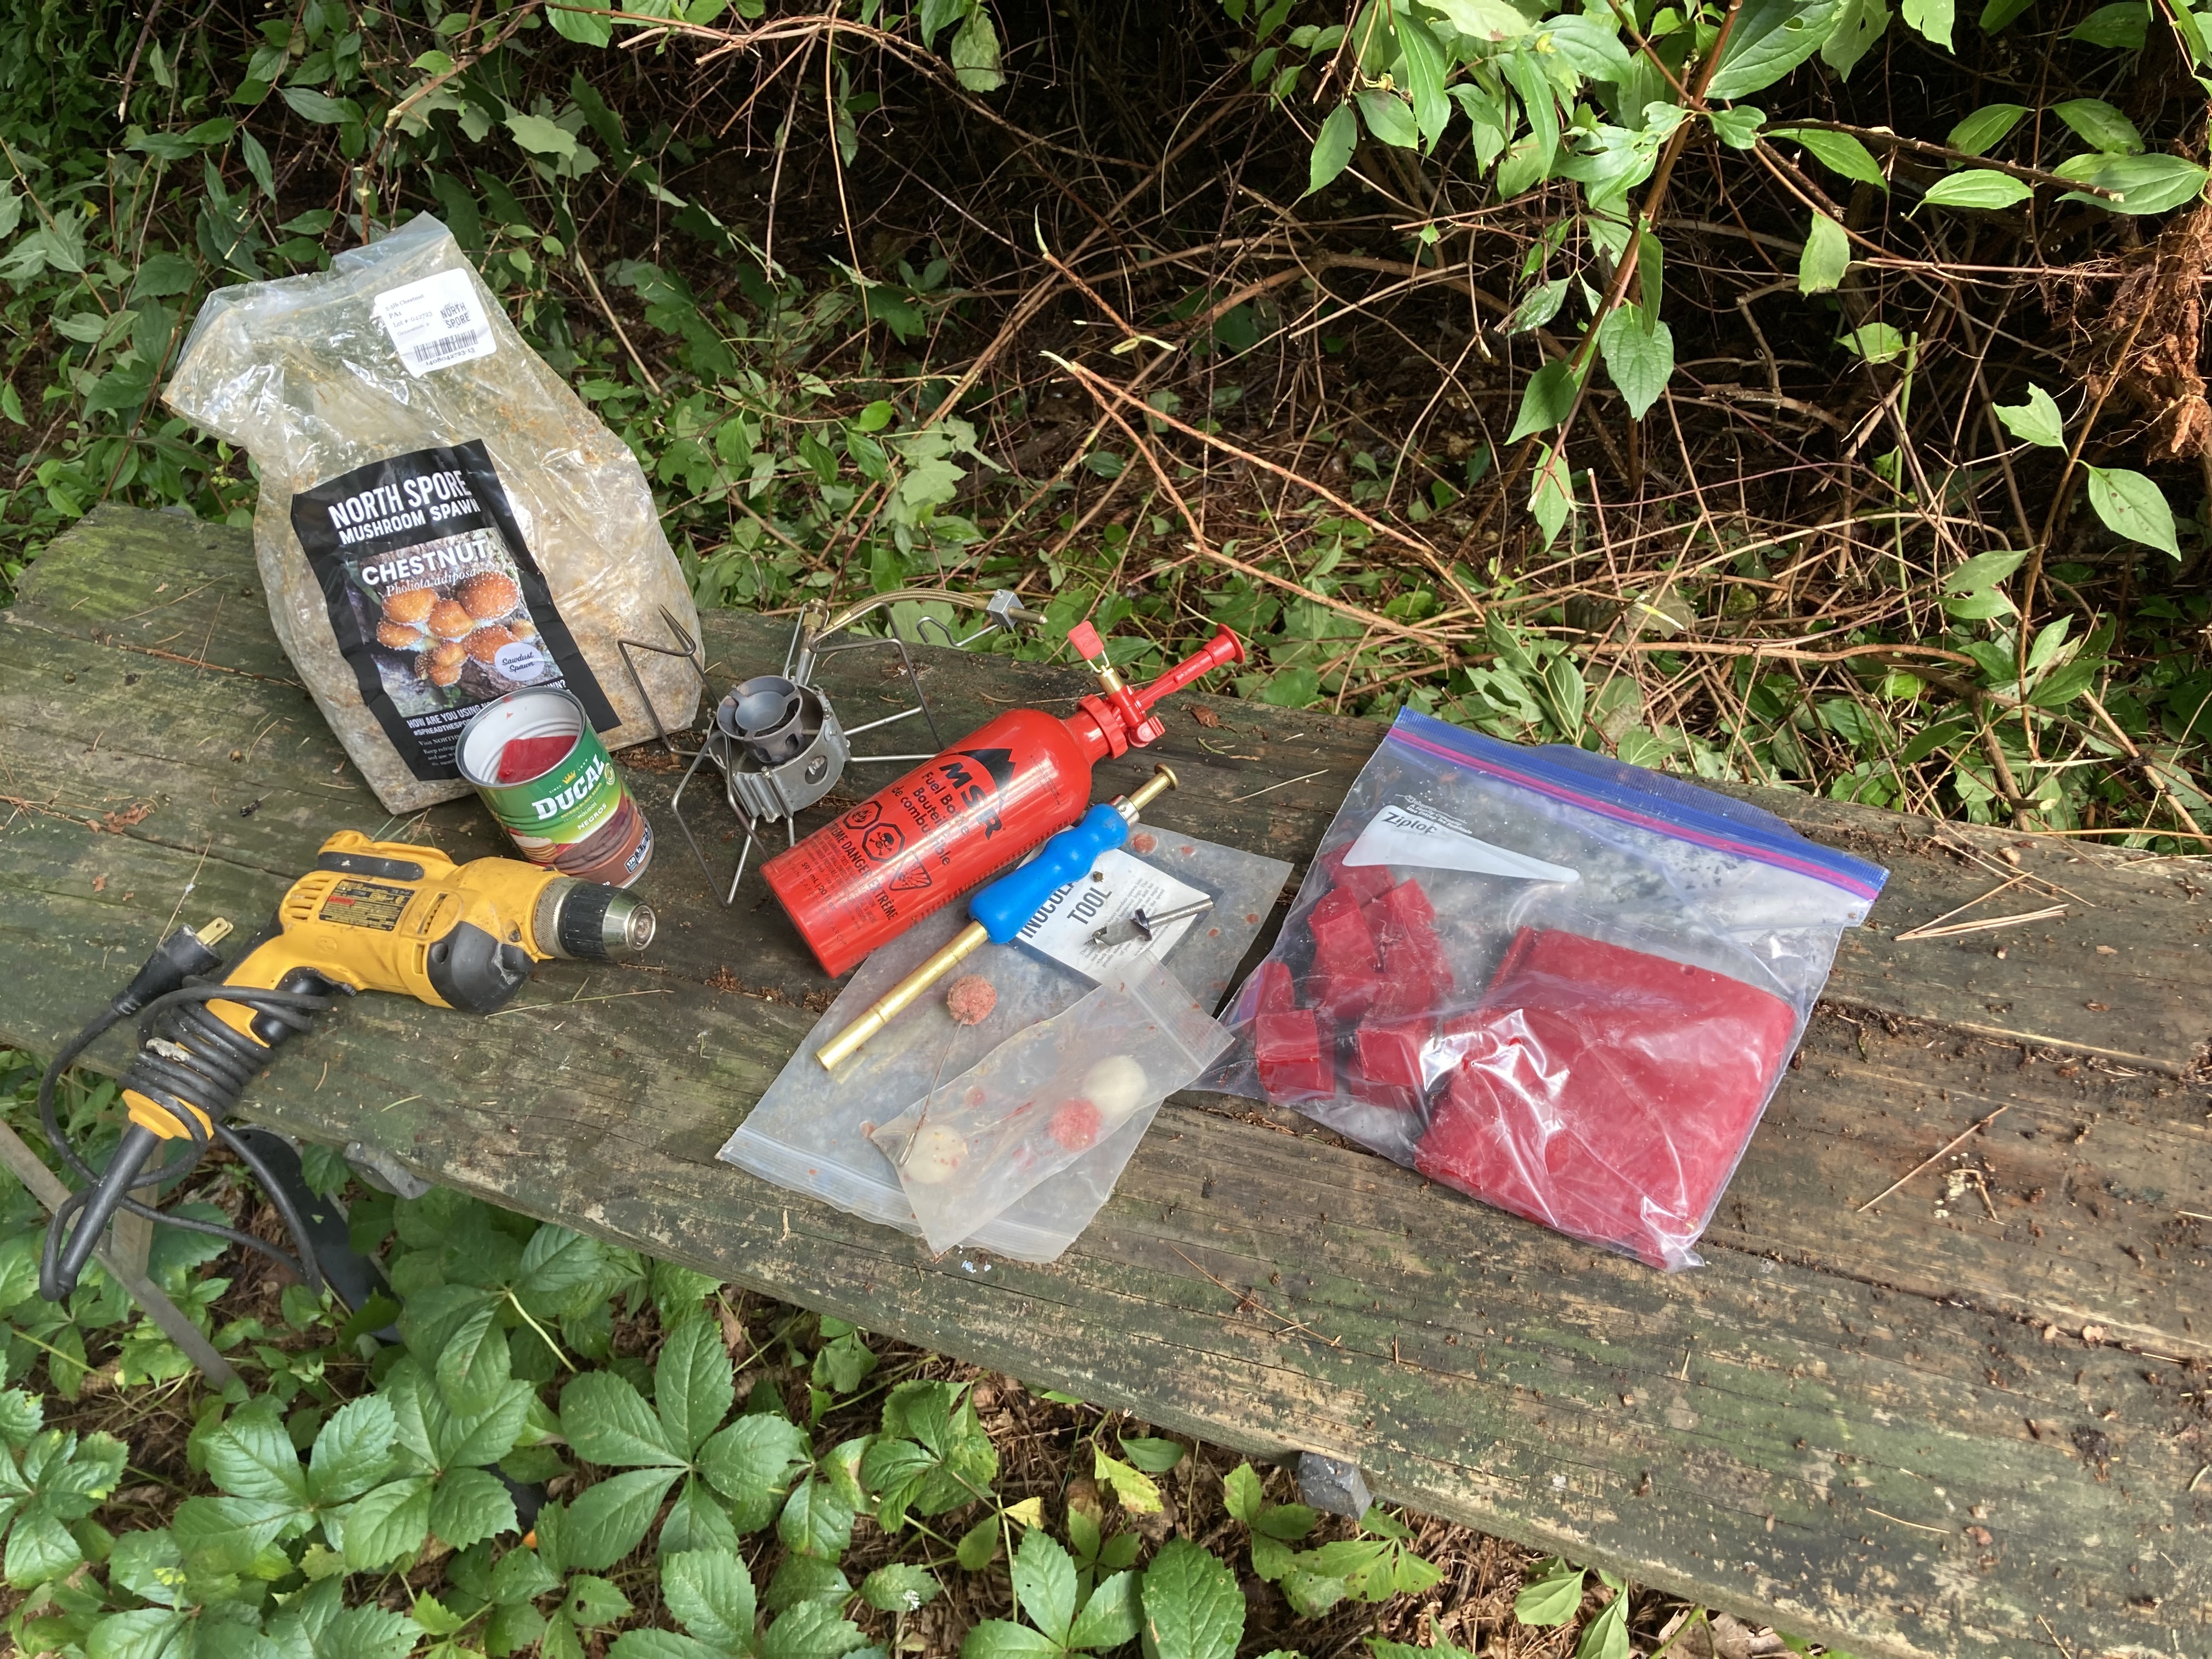
-A drill. Highly recommend going corded here. Fresh wood is wet and dense and it takes a lot of torque to drill into it efficiently. A cordless drill could be used but it would have to be pretty beefy & have lots of extra batteries.
-An inoculation tool. This is probably the only specialty tool needed, and can be bought from where you buy your spawn. It’s a spring loaded plunger attached to a brass tube designed for collecting sawdust spawn and injecting it into holes in the log. These run about $30 or so.
-A drill bit. This should match the diameter of the inoculation tool. There exist specialty bits for this with a stop at exactly the same depth as the inoculation tool, but a drill bit with tape as a depth gauge would work fine too just be a little slower. The important part is to match the dimensions of the inoculation tool. You could measure the depth of the tool with a piece of wire. If you do decide to get the specialty bit, filing or grinding a flat spot on the shaft is a MUST:

Again the torque from drilling into fresh logs is quite high so if you don’t do this the bit will strip and get stuck in the wood, leading to grief and frustration and slowing you down. Just file it!
-A saw (not pictured). Hand or chain. This is useful for cleaning up the ends of logs to remove mold and make it easier to wax.
-A table. Not a must but makes working much more comfortable particularly if you’re doing this alone. If you only have one you will want to set up your wax on it. If you have 2 use one for drilling and the other for wax. I wouldn’t recommend both on the same table because logs can jerk unpredictably during drilling and it can knock wax over, greatly slowing you down. You should be willing to cover this in wax, or put down some rosin paper.
In the next post I will cover the technique of inoculation. If you’ve made it this far, congratulations. Setup is the hardest part.