In the last few months I haven't run a lot because of the weather (hot and humid) and because of a crap ton of uni work for my thesis. Yesterday I finally managed to run a 10k after literally months. With respect to my usual form it was terrible, i run a 6:10min/km when usually I'm well below 5:45, but considering I had run like twice in the past month and a half and had been months since my last 10k I'd say it was a good result
I started using OpenTracks a couple years ago and ditched runtastic (i keep calling that, it's been adidas running for ages) when I discovered it made my runs public, with gps data and all, for the social features of their app. OpenTracks is FOSS, I got it from fdroid, the data stays on your phone, you do what you want with it. And most importantly it only tracks your activity, just that, no social media crap.
Then again if you don't want to track your runs just don't, I personally do it because I like to see my progression and to keep notes to myself on how/what/when i eat/sleep/etc effects my runs and stuff like that
Was it in "Ubik" that people had to pay a fee every time they wanted to use their domestic appliances or even open the door to their own house?
Not one in particular, just the first thing that came to mind since I use it a lot on linux. I even use NewPipe on android, didn't even remember it had an option to download
Nah 85/90 degrees is perfect for the job. Much better and more uniform than a heatgun, let alone a hairdryer
Is that a motorola moto z2 play? I owned that phone and I used to disassemble it just like this!
Edit: saw in another comment that it's a z4. The camera did look strange for a z2 at a second glance
While I don't remember his name, I remember there was a Darknet Diaries episode about the researcher who first investigated the problem. The episode was very thorough, I liked it a lot. I also don't remember the name of the episode, so I guess this comment is kinda useless
Also dumbest idea, have you tried a brand new spool of PLA? Just to exclude an incredibly wet filament. Because that can cause all sorts of problems
Hello, I suggested heat creep in your last post, which didn't end up being the issue. I don't remember if anyone suggested it, but have you tried checking the bowden assembly, on the motor side? Whether the stepper works, or the gears wore down (I'm pointing towards this), or there are clogs somewhere in the mechanism, even some dust that accumulated where it shouldn't had. Or did you change settings like the current limit on the steppers? If that's controlled with a potentiometer on the main board, maybe it got turned down for some reason (if so, I'd try to understand why's that). I don't know how Klipper handles motor drivers where current limits are controlled in software, I know that Marlin has a dedicated submenu in the Configuration>Advanced Configuration. If you reflashed the firmware, maybe the settings where in the eeprom and did not get transfered over or got overwritten in the flashing process.
I remembered that on a couple different printers I had the same problem as you, and it came down to damaged/untightened nozzles (which you excluded already) or wore down gears or, on the printer I'm working on right now, too low current limits which made the stepper skip steps somewhat randomly
That's exactly how I wpuld test heat creep. Maybe that's not it
Since you've already excluded a damaged nozzle and other parts, I'm gonna suggest heatcreep.
Maybe the extruder fan broke, so heat creeping up the extruder and melting the filament before it should?
The lid of the pot. Keeping the pot covered makes the water boil quicker
I did that some time ago. I just put the letter in an envelope, with just the receiver address on it, went to my local post office, paid for the service and the stamps, left them the letter and I was done.
cross-posted from: https://sh.itjust.works/post/13637559
> Hello everyone, I need some advice. > > I am making custom PCBs for a project of mine. It's basically for a little remotely controlled robot using little DC motors. I chose the Seeed Studio XIAO ESP32C3 as the uC since it has inbuilt wifi/bt, 3.3V regulator that I can use to power the motors (can source up to 700mA) and lipo charging management (the robots will run on battery). As you can see from here, the microcontroller is surface mounted and the pads for the battery are on the bottom layer. Same story goes for the thermal pad of the microcontroller and the thermal pad of the motor driver (datasheet). > I have worked with SMD components in the past and can solder them by hand, but I have never worked with SMD components that have thermal pads on the bottom layer. My question is: how to manage (route?) them? My PCB is 2-layer and I was planning on having both layers filled with a ground plane. Do I just connect thermal pads to the ground plane and call it a day? Wouldn't that make the components hard to solder with hot air? Do I make an isolated polygon that only acts as a thermal pad? > > > Speaking of soldering is even hot air the way to go in this case? My PCB has components on both sides, and I was planning on ordering stencils together with the boards and using solder paste, placing the components and then using hot air to solder the components in place. I thought a hot plate would be better but I don't have access to one and I don't know how that works with components on both sides. > > > I attached some photos of the PCB in Kicad, and here's the git repo. If it is of any help, I'm planning of having them manifactured by JLCPCB. > It is also my first time using KiCad, so go easy on me :) > > > Thanks! > > > [![][1]][1] > > [![][2]][2] > > [![][3]][3] > > > [1]: https://files.catbox.moe/ztw2pb.png > [2]: https://files.catbox.moe/hytn9j.png > [3]: https://files.catbox.moe/l9nqcb.png
Hello everyone, I need some advice.
I am making custom PCBs for a project of mine. It's basically for a little remotely controlled robot using little DC motors. I chose the Seeed Studio XIAO ESP32C3 as the uC since it has inbuilt wifi/bt, 3.3V regulator that I can use to power the motors (can source up to 700mA) and lipo charging management (the robots will run on battery). As you can see from here, the microcontroller is surface mounted and the pads for the battery are on the bottom layer. Same story goes for the thermal pad of the microcontroller and the thermal pad of the motor driver (datasheet). I have worked with SMD components in the past and can solder them by hand, but I have never worked with SMD components that have thermal pads on the bottom layer. My question is: how to manage (route?) them? My PCB is 2-layer and I was planning on having both layers filled with a ground plane. Do I just connect thermal pads to the ground plane and call it a day? Wouldn't that make the components hard to solder with hot air? Do I make an isolated polygon that only acts as a thermal pad?
Speaking of soldering is even hot air the way to go in this case? My PCB has components on both sides, and I was planning on ordering stencils together with the boards and using solder paste, placing the components and then using hot air to solder the components in place. I thought a hot plate would be better but I don't have access to one and I don't know how that works with components on both sides.
I attached some photos of the PCB in Kicad, and here's the git repo. If it is of any help, I'm planning of having them manifactured by JLCPCB. It is also my first time using KiCad, so go easy on me :)
Thanks!
[![][1]][1]
[![][2]][2]
[![][3]][3]
[1]: https://files.catbox.moe/ztw2pb.png [2]: https://files.catbox.moe/hytn9j.png [3]: https://files.catbox.moe/l9nqcb.png
cross-posted from: https://sh.itjust.works/post/11620383
> Just thought it would be fitting building while watching the matching Christmas special! > > > !PXL_20231225_231413756 > > !PXL_20231225_222959144 > > KIDNEYS! > !PXL_20231226_003811378 > > All finished up > !PXL_20231226_003909786
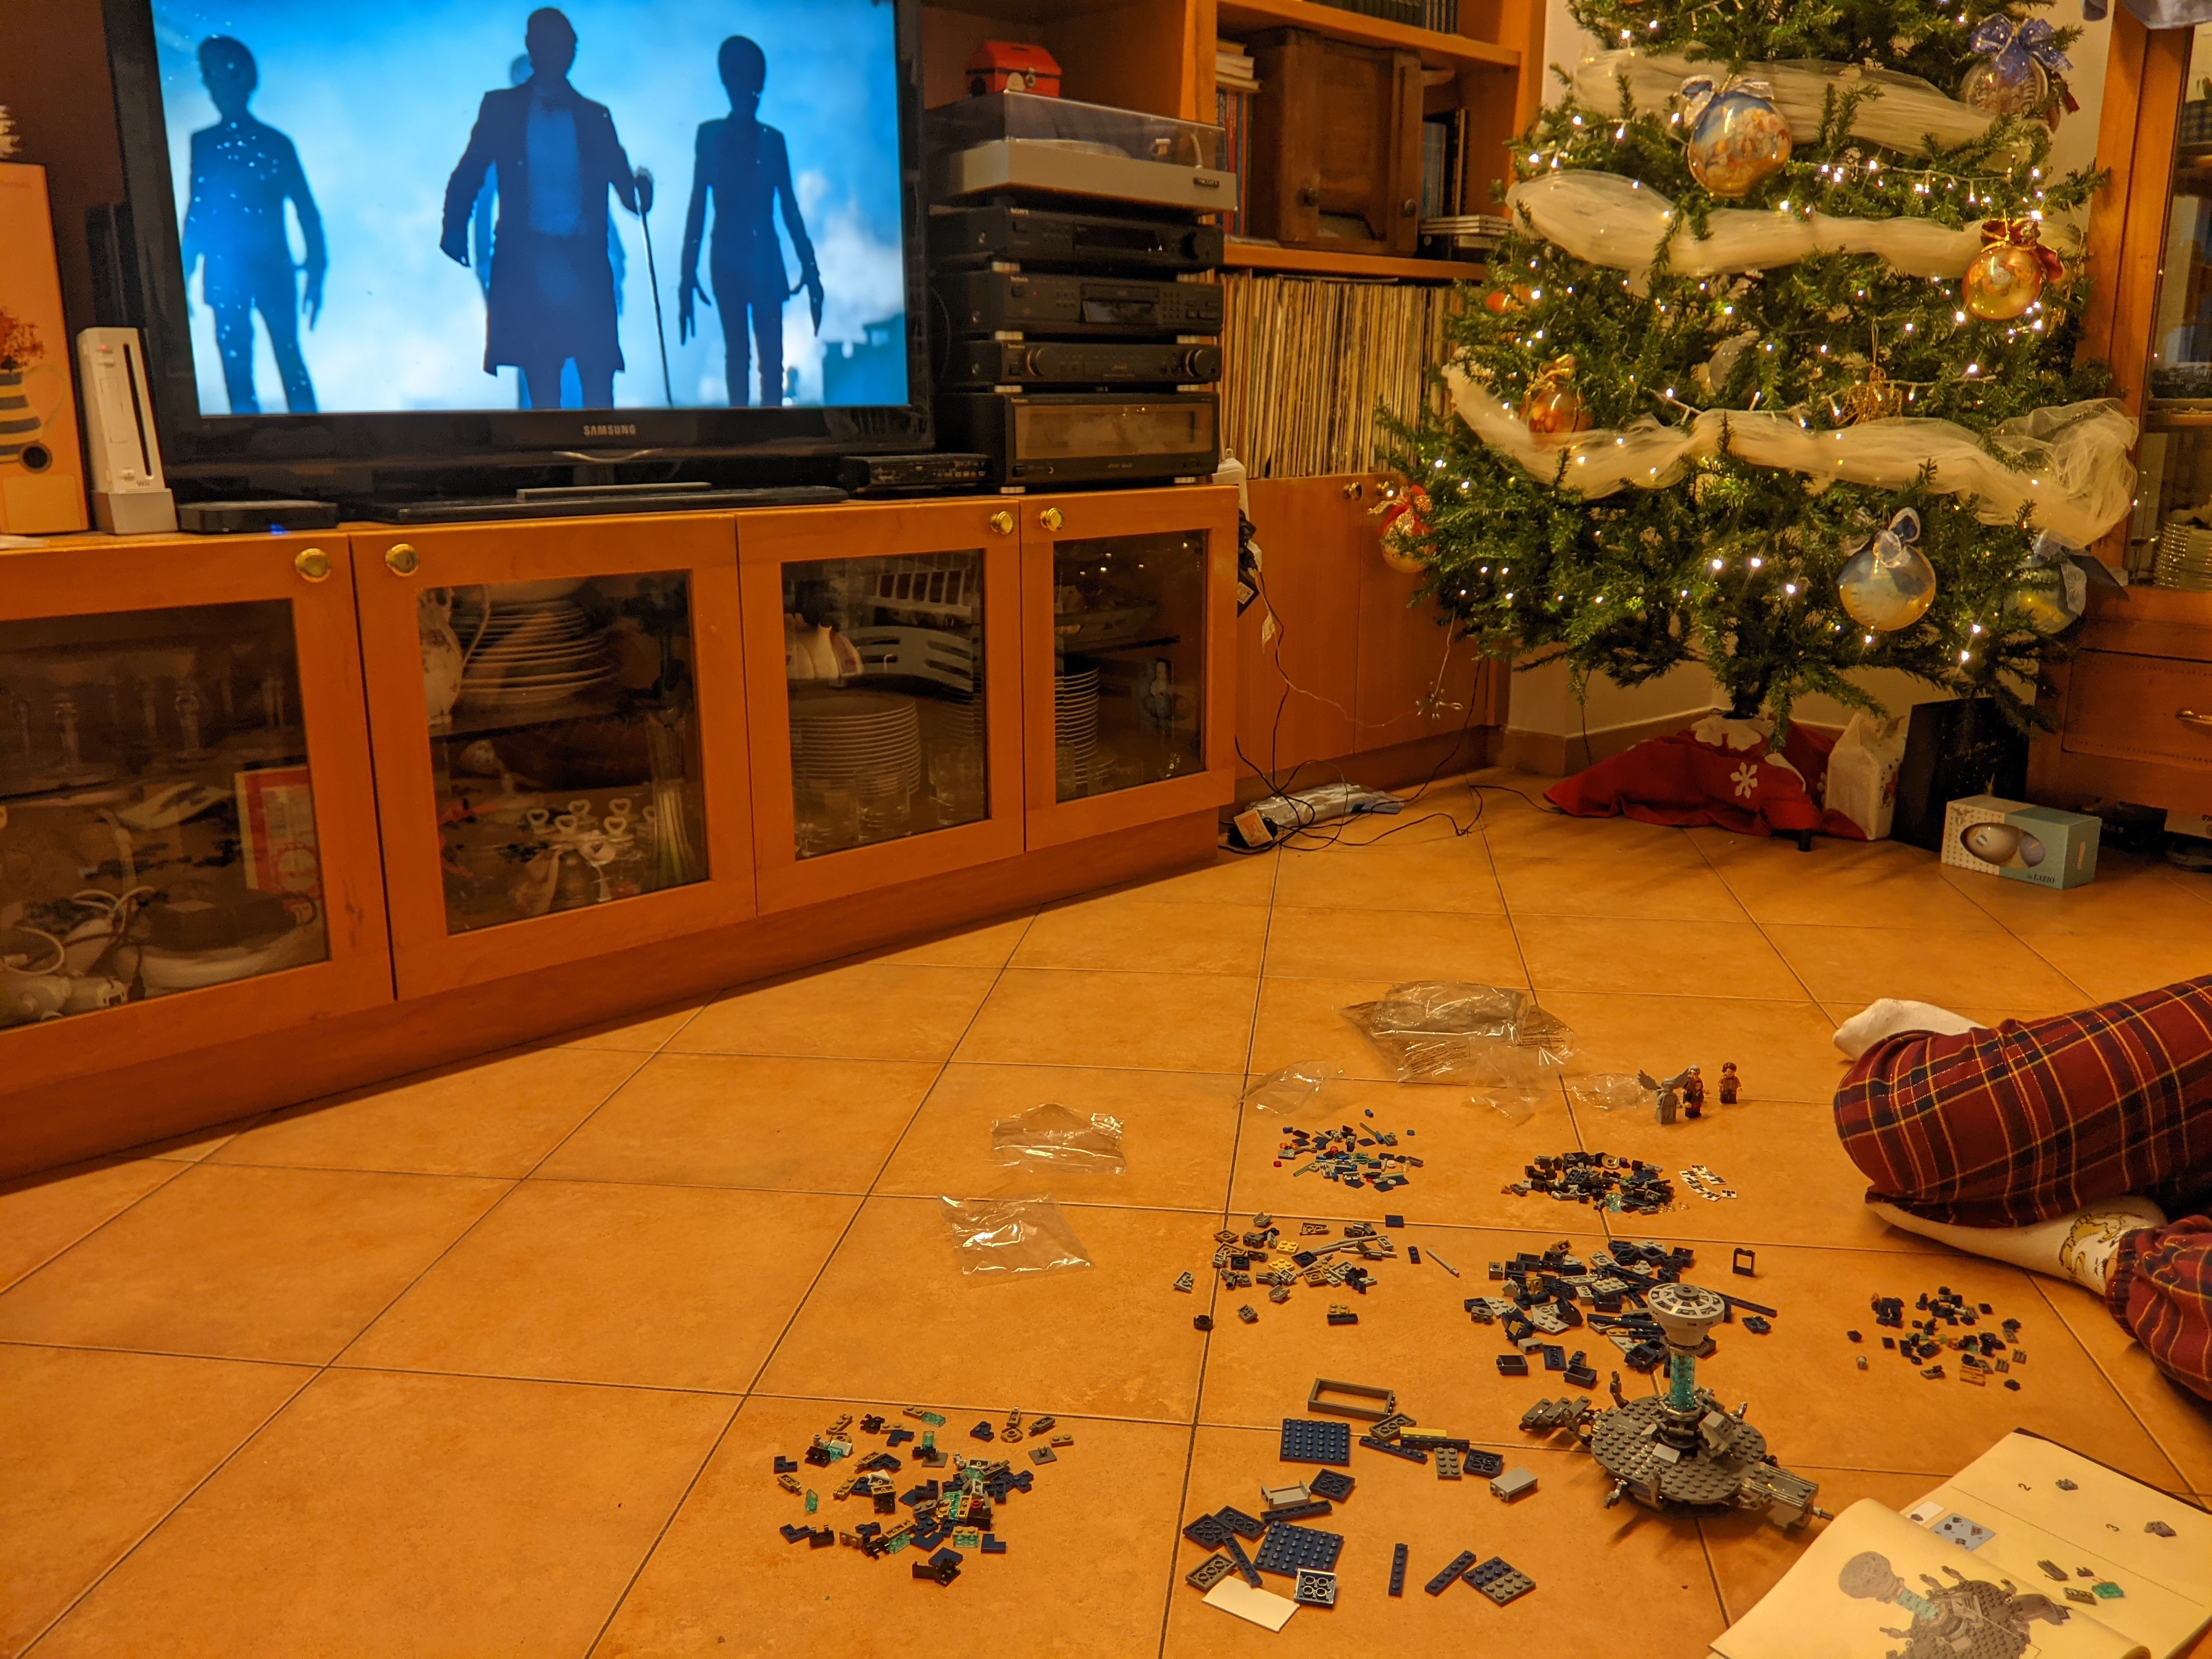
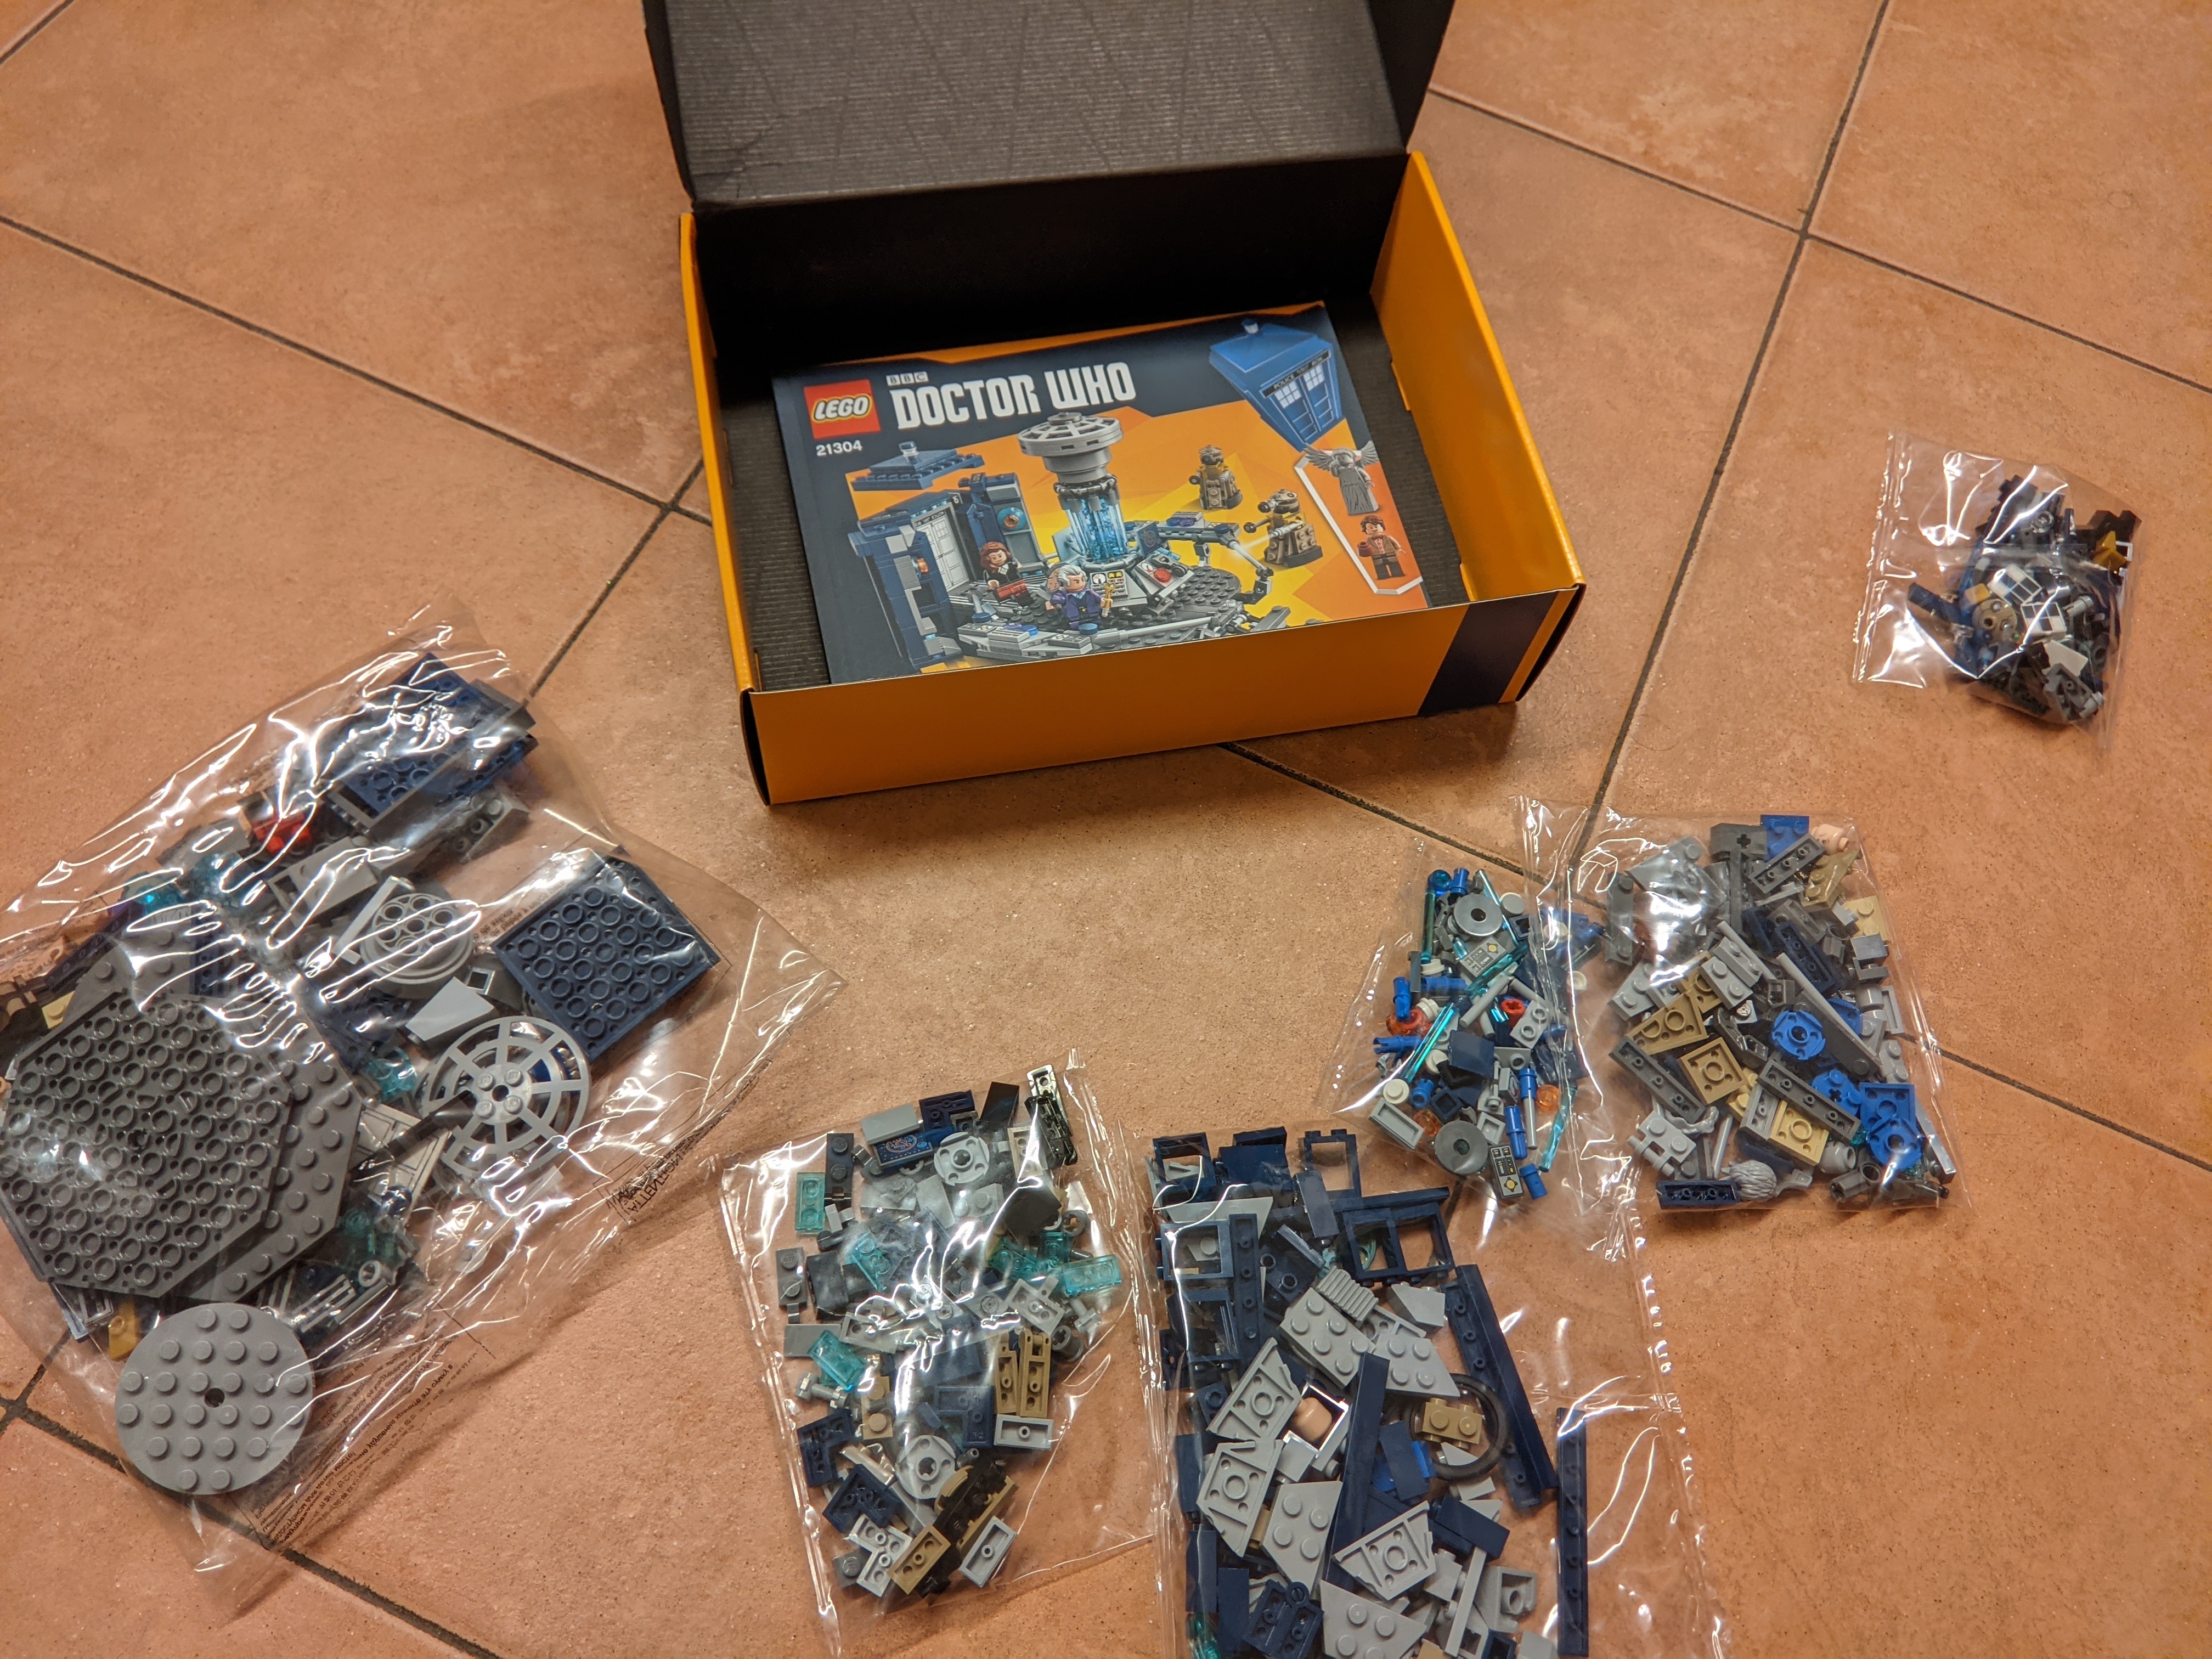
Just thought it would be fitting building while watching the matching Christmas special!
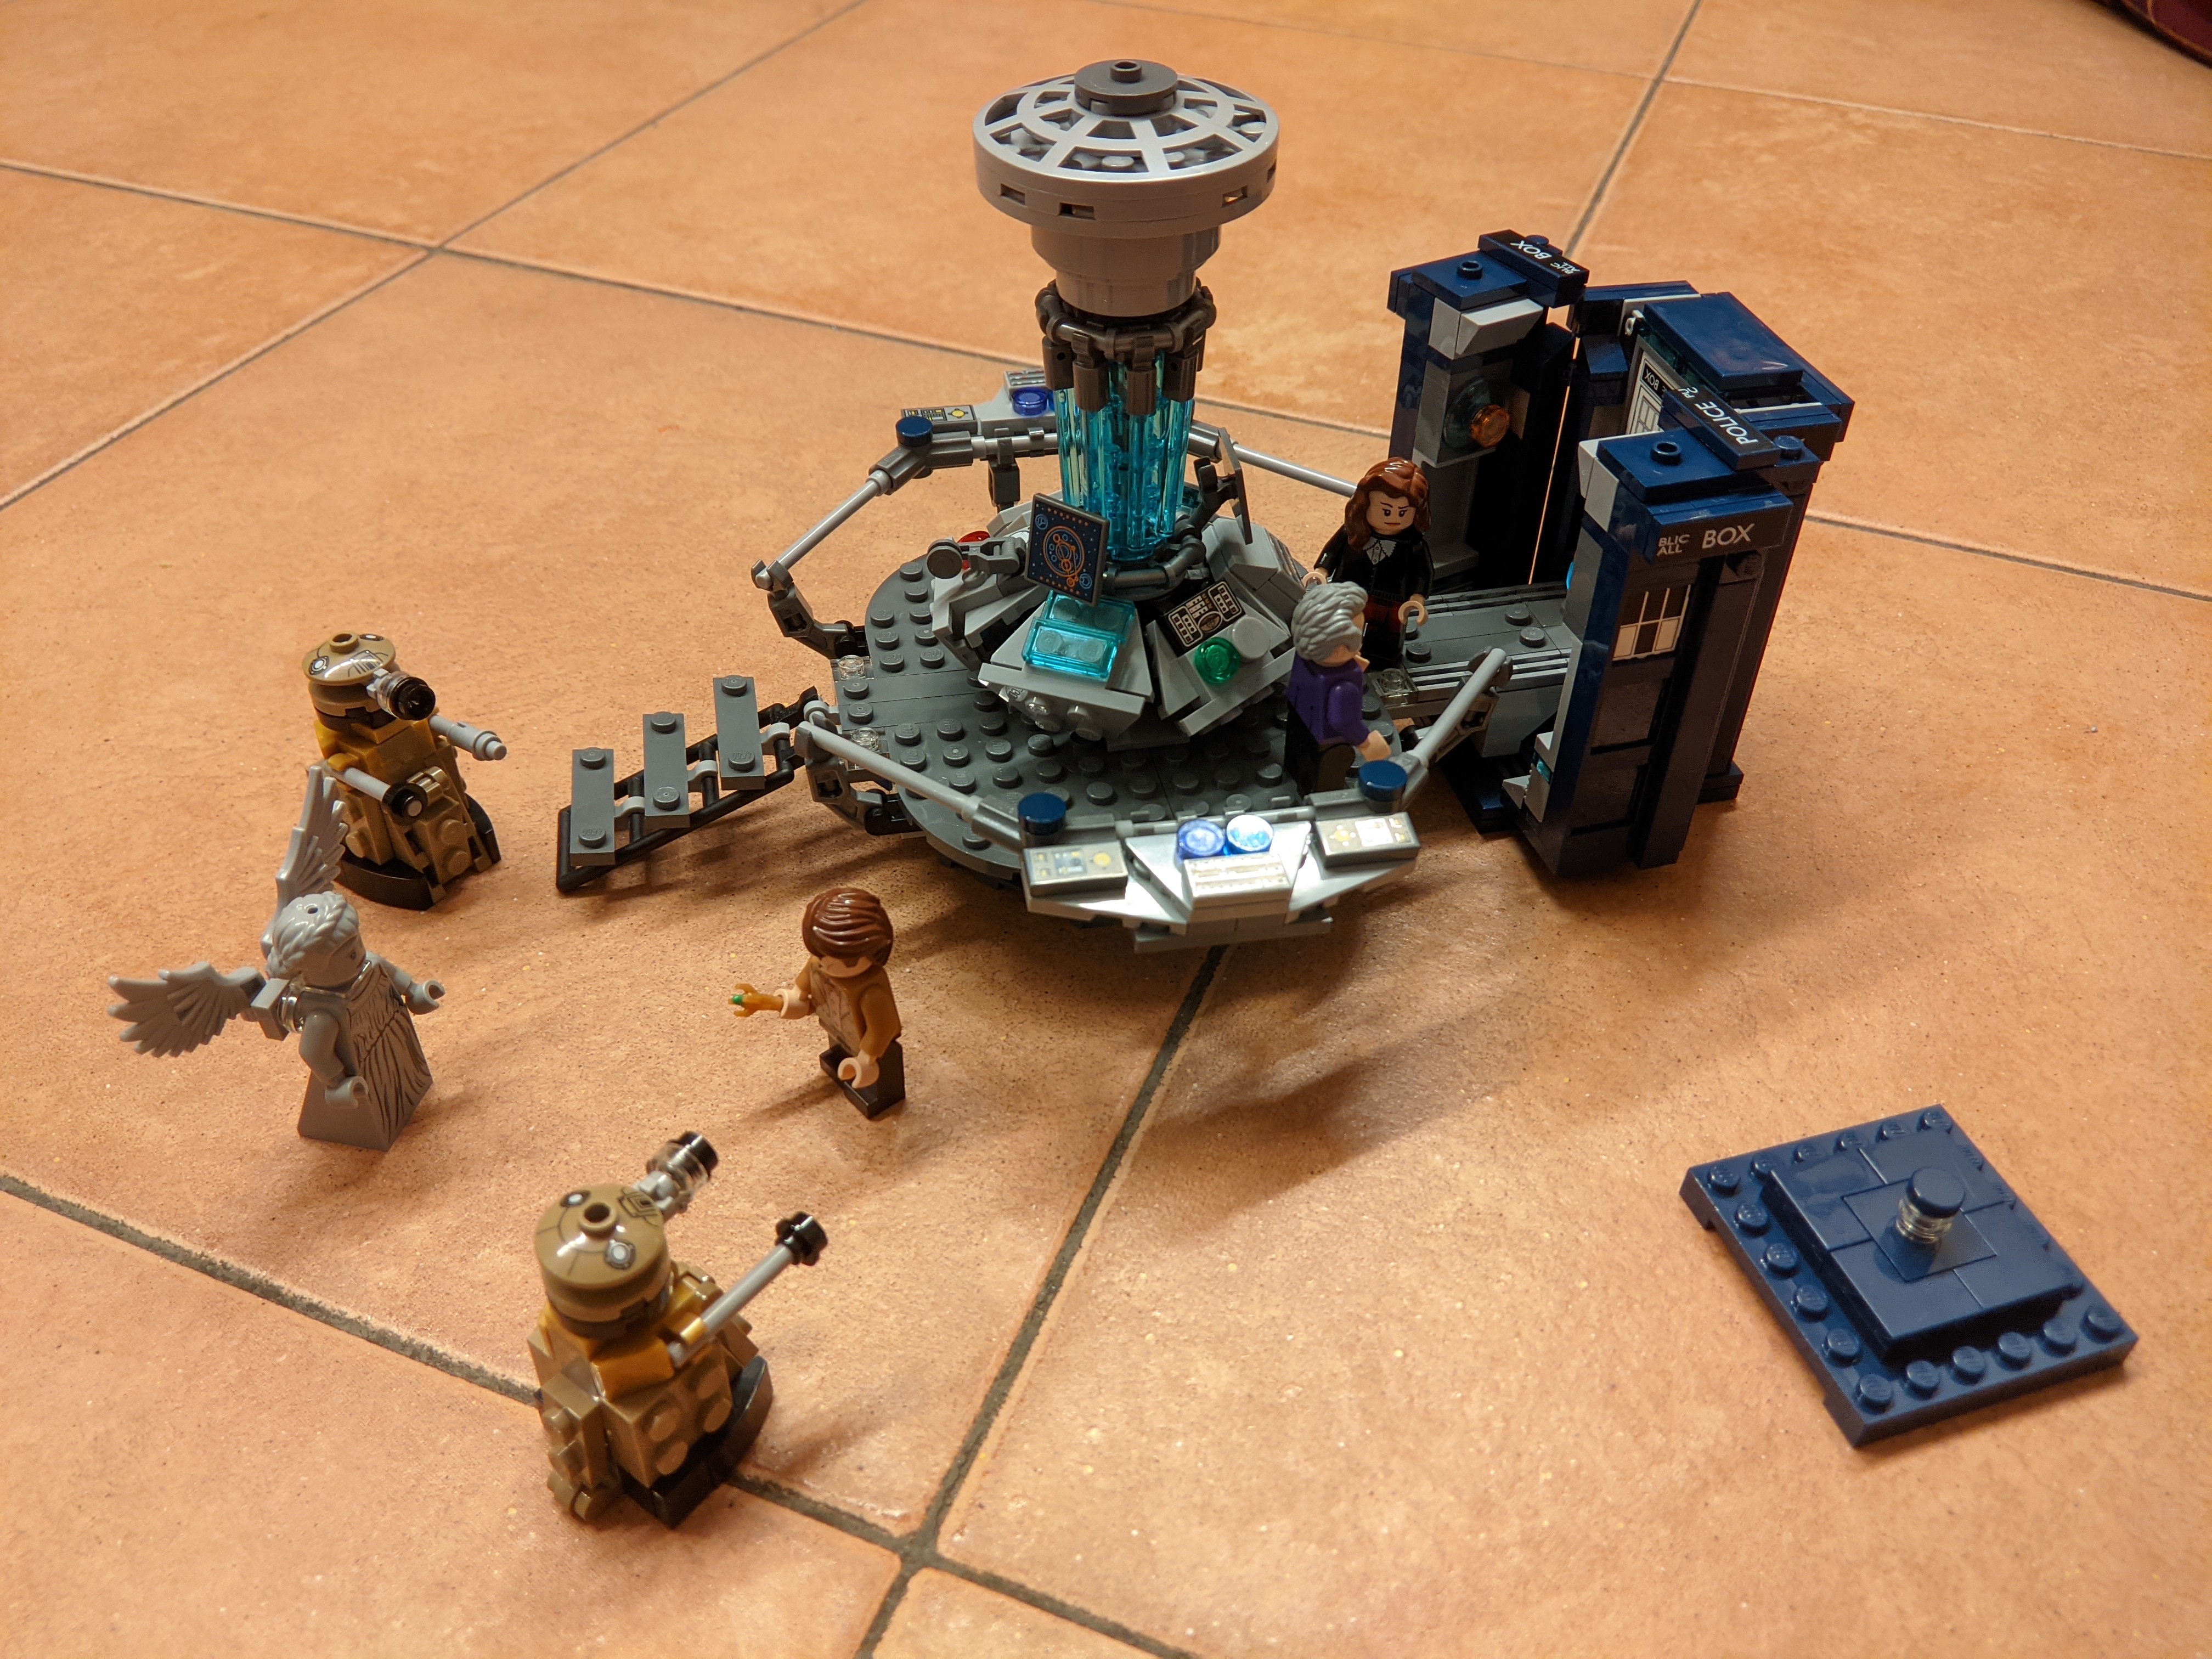
KIDNEYS! !PXL_20231226_003811378
All finished up !PXL_20231226_003909786