
This came after a 250 attempt session where my previous best was 38%. There really is only 1 difficult part after 50%, though, so hopefully I'll be able to get through it to complete a new hardest.
This one's really good! I like that it works well as a monochrome icon while also having a detailed full-color icon.
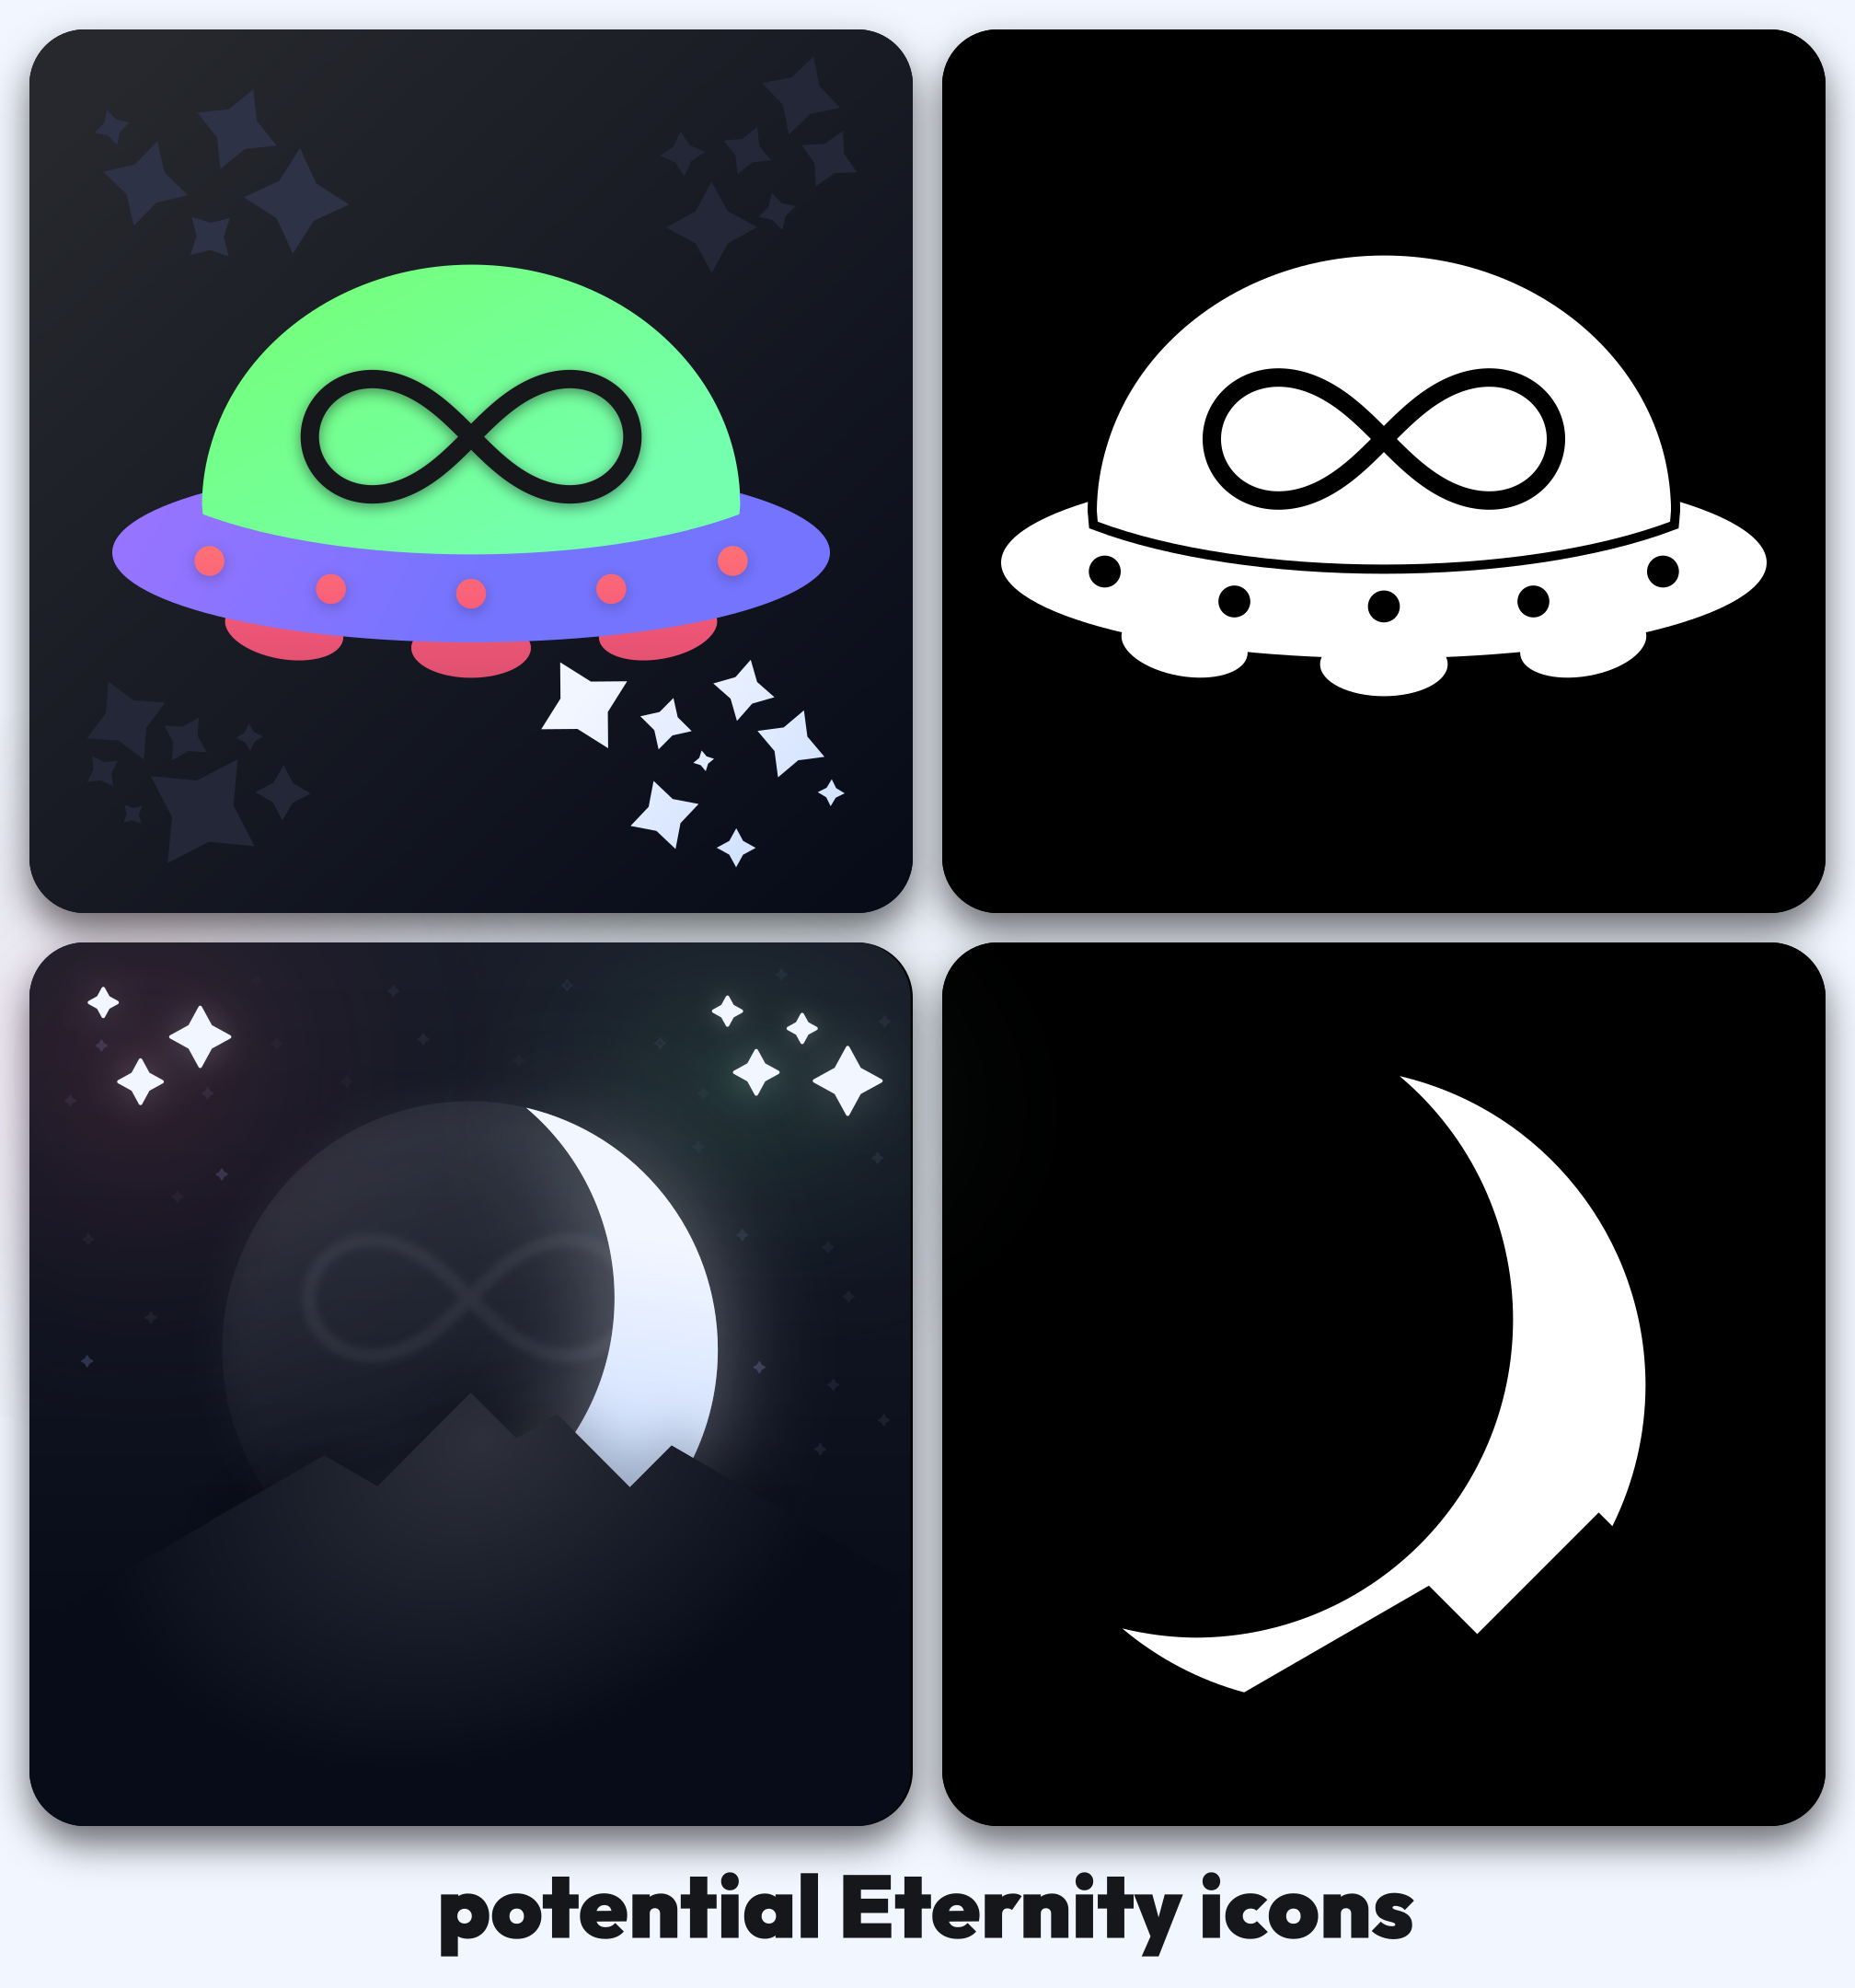
Here is a showcase of my icons, both monochrome and full detail. One was inspired by the UFO design, one by this community's current placeholder icon. I could tweak these a little more, but I think that these are good for now.
I think it's a pretty cool underground subway sort of scene. I could do more with the walls but I think that this is overall pretty neat
Alt Text Description:
An underground metro/subway styled scene created in Geometry Dash. Two pillars surround a bench in the center of the screen. Two posters are on the walls. A fluorescent light is above the bench.
Pay attention to "Progresses" if you don't see it. Yes, I did practice beforehand, but this is still quite the feat, especially considering this is a fluke from 32% in an XL-length hard demon which led to a completion with less than 100 runs from 0%.
Too bad my game crashed immediately after this (which is why there's artifacting, I took this screenshot from my recording), but at least I got video of the completion, which can be found right here.
This guide presents 3 different ways to play flash games on your deck, ordered by complexity. This is actually a remake of a guide I had previously made on Reddit, but seeing as that platform is failing, I wanted to move this guide elsewhere, taking the time to recreate it.
Here are some videos covering the stuff here (not by me, though):
- Basic Guide (Discover Store Method)
- Intermediate Guide (Flashpoint Method)
- Troubleshooting with the Intermediate Guide
---
Basic Guide (Discover Store Method)
To start off, first open up the Discover Store and search "Adobe Flash Player". Install the entry that looks like this:
!Screenshot of the app page for "Adobe Flash Player" on the Discover Store
Next, acquire some SWF files (flash games). You can find these in many places, but I've found that a game's speedrun page will most likely have the SWF file for that game. After downloading, use the Dolphin file manager to place these files in an easy to find spot.
!Screenshot of a folder in Dolphin containing several SWF game files
Finally, open up the Flash Player installed from the Store. At the top left of the window, hit File > Open. Select any of the SWF files you've acquired. You are now playing a Flash game.
You can make a custom control configuration for Flash by adding the Flash Player as a non-steam game. This will enable you to use keyboard controls with your Deck's inputs. (At this point however, you might as well use the next guide).
Limitations with this method
- Unable to play most Flash Games (see beginning of Intermediate Guide)
- Requires you to search for SWF files
- Only 1 app, therefore only 1 controller configuration possible for all of your flash games
Benefits with this method
- All Flash Games are in one place with little extra configuration
---
Intermediate Guide (Flashpoint + Proton)
You may have noticed with the Basic Guide that some (if not most) Flash Games do not work. This is because many Flash Games rely on a connection to an external server; the Discover Store Flash Player cannot simulate this connection. Another app, Flashpoint, does simulate this connection, and is what will be installed in this guide.
Installing Flashpoint & CLIFp
Begin by going to the Flashpoint download page and downloading the Windows EXE of Flashpoint Infinity.
!Screenshot of the Flashpoint Download Page with the correct link highlighted
Next, open up Dolphin and find the downloaded file. Change its extension from .exe to .7z. Open the file with Ark and extract its contents to a place that's easy to find.
Your Flashpoint folder should now look like this.
!Screenshot of the Flashpoint folder just after extraction
We will now need to download an app called CLIFp, which we need as Flashpoint's normal GUI crashes on Steam Deck. Go to the releases page of CLIFp and Download the latest Windows Static build.
Extract the contents with Ark, and find CLIFp.exe under bin/. Move CLIFp.exe to the Flashpoint folder.
!Screenshot of the contents of the extracted folder, with an arrow pointing to the bin/ folder.
Your Flashpoint folder should now look like this.
!Screenshot of the Flashpoint folder with CLIFp.exe in place, next to start-flashpoint.exe
Adding Games
Once CLIFp is in the correct place, add CLIFp.exe as a non-steam game. Go to the properties page for CLIFp, and enable Proton for CLIFp (any modern version should work).
!Screenshot of the properties page for the CLIFp.exe non-steam game on the compatibility section
All that's left is to specify which game CLIFp should launch. Go to the Flashpoint Search Tool, and search for the game you want to play. Find its ID (xxxxxxxx-xxxx-xxxx-xxxx-xxxxxxxxxxxx), and copy it.
With the ID copied, all that's left is to add some launch options to CLIFp. Open up the properties page for CLIFp again, and under launch options, add play -i [ID], where [ID] is the ID you previously copied. Now, your game is ready to play.
You can add as many CLIFp non-steam games for as many Flash games as you want to play. Do be aware of the following limitations, however.
Limitations with this method
- Each flash game requires a ~200MB Proton prefix that gets stored on the Deck's internal drive. This fills up storage quickly, depending on how many games you wish to play.
- Some games (much less than with the Basic Guide) still do not work. Some may show a white screen, others may not play properly.
Benefits with this method
- Much more Flash games work this way.
- Each Flash game can have its own custom controller configuration
- You do not need to search for game SWFs
---
Advanced Guide (Flashpoint Script)
This guide requires the most setup, but will provide the best possible experience.
Acquiring Scripts
Before starting the Advanced Guide, install Flashpoint and CLIFp. This is covered in the first few steps of the Intermediate Guide. You can continue with the advanced guide once CLIFp.exe is in the correct place.
You will need to acquire 2 user scripts for this step. Check out and download each script, making sure to place them in your Flashpoint directory and setting each as executable in their properties:
Each script targets Proton 7.0 by default. If you want to use a different version of Proton to run your games, you will need to go into the scripts and change the path in $proton_bin.
Script 1 plays games through Flashpoint, and should be used by default. If a game does not work with Script 1 (white screen), you may try Script 2 (YMMV with it, however).
I recommend renaming each script. I renamed Script 1 to fp.sh and Script 2 to fp-direct.sh.
!Screenshot of the Flashpoint directory with the added shell scripts
Acquiring wmctrl
You will also need wmctrl. You don't need to disable readonly mode to do this, just download the package here. Create a directory called .wmctrl/ in the Flashpoint directory, and place the extracted contents of the package in it. (You can remove everything other than the usr/ file if you want.)
Adding & Configuring Games
With your scripts in place, go to the Flashpoint Search Tool, and search for the game you want to play. Find its ID and copy it.
Now you can add Script 1 as a non-steam game. After adding the script, go to its Launch Options. Add --uuid [ID], where [ID] is the ID you copied previously. Launch the game once; if you see a white screen, try using Script 2 instead.
Configuring Window Size
These next few steps are not strictly necessary, but they allow you to configure the window size for the best experience in Gaming mode.
With the game open in desktop mode, make note of the window title and the size of the game window while not in fullscreen. Use the size of the game window to calculate its aspect ratio (divide width by height). Spectacle (the screenshot tool) may be useful as it allows you to see how large any part of the screen is.
If you want to use the original window size, simply use the measurements you got. If you want to fill the Deck's screen size, use 800 for the height and 800 * the aspect ratio for the width.
Go into the game properties for the Flash game. Add --winname [name] --width [width] --height [height], where [name] is the name of the window, [width] is the desired width, and [height] is the desired height. Now, the game will automatically resize itself after starting up.
Limitations with this method
- Configuring window sizes can be tedious for every single game
Benefits with this method
- No need to bind a "fullscreen" key for a controller configuration
- Does not generate a large proton prefix for each Flash game (only 1)
---
Bonus Guides
These are just some extra guides that I feel could be potentially useful.
Flash Game Launcher (for Advanced Users)
You may miss having one place to play all of your Flash Games from the Basic Guide, or you may want something like EmulationStation for Emulated Games. While there isn't a solution specifically for Flash Games, I've found Pegasus Frontend to be good for this purpose.
In order to add Flash Games to Pegasus, you must first set up the scripts present in the Advanced Guide. With that done, a basic metadata.pegasus.txt file for Flash Games (with the script called fp.sh) should look like this:
``` collection: Adobe Flash shortname: flash command: /path/to/Flashpoint/fp.sh --uuid "{file.basename}"
game: My Flash Game file: 16b04977-f714-4239-b343-b759e16a33af ...
game: My Other Flash Game file: a8591065-1c64-4242-a2fc-99f16766aed9 command: /path/to/Flashpoint/fp.sh --uuid "{file.basename}" --winname "Adobe Flash Player" --width 1066 --height 800 ... ```
Using Bottles instead of Proton
Though Proton is a useful option, you are able to do the same thing with Bottles.
You'll first need to enable all file access for Bottles. This can be done with Flatseal.
All that's needed is to create a new Bottle, then add CLIFp.exe and add the necessary arguments (play -i [ID]).
This also enables you to use bottles-cli. The command (when Bottles is installed as a Flatpak) goes like this:
flatpak run --command=bottles-cli com.usebottles.bottles run -b [BOTTLE_NAME] -e "/path/to/Flashpoint/CLIFp.exe" 'play -i [ID]'
Replace [BOTTLE_NAME] with the name of the Bottle, /path/to/Flashpoint with the path to your Flashpoint folder, and [ID] with the Flashpoint game ID.
---
I may provide a video guide of my own for the future, but for now this will be it.
I haven't really continued building beyond improving on the part shown in the video in these past few months, however. I'm still unsure how exactly I should continue the level and its ideas.
(video previews seem to not work on lemmy.world, but the link should bring you to the video.)
