Ideally you would never have to because you just have the two people come up with their part of the password and then initialise the LUKS partition together. Sorta like a key ceremony
You can also just split the password for a single LUKS into two parts and give one each to the two people :D
well it was less underextrusion and more the printhead just trying to go supersonic at those spots and the material just didn't flow fast enough :D
I also figured out, I can adjust the max volumetric speed of the PETG filament settings and that will limit the wall speeds autumatically

Edit: This turned out to interact weirdly with layer height changes, I ended up just reducing the max speeds.
Looks like the default speed settings in the slicer was just too fast :D
So yeah, that solved it! Set it to 50mm/s maximum and it just disappeared! Thanks for the suggestion :)
I just spent some more time observing and yeah, the printer tries to go super sonic for the walls there with up to 150mm/s :kekw:
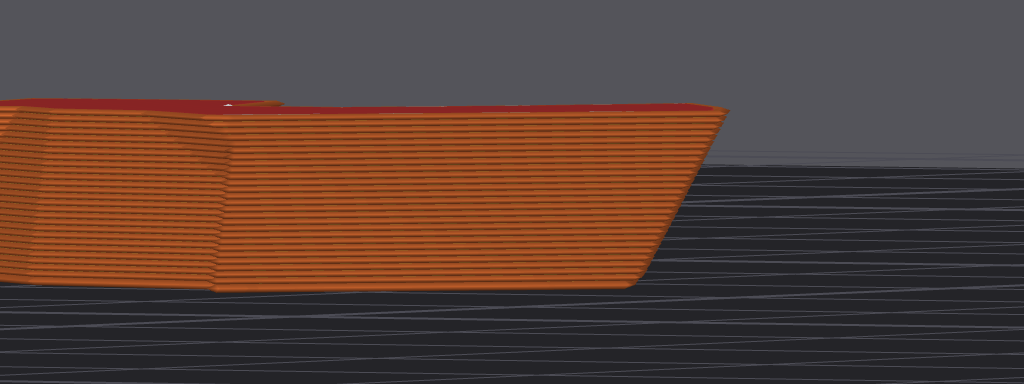
It's kinda not at the start or end of the layer. The layer starts with the inner wall, which prints fine and then it does the outer wall which doesn't do fine.

Which corresponds to the wall here

What slicer are you using?
Bambu Studio 1.8.4.51
Thanks for the input!
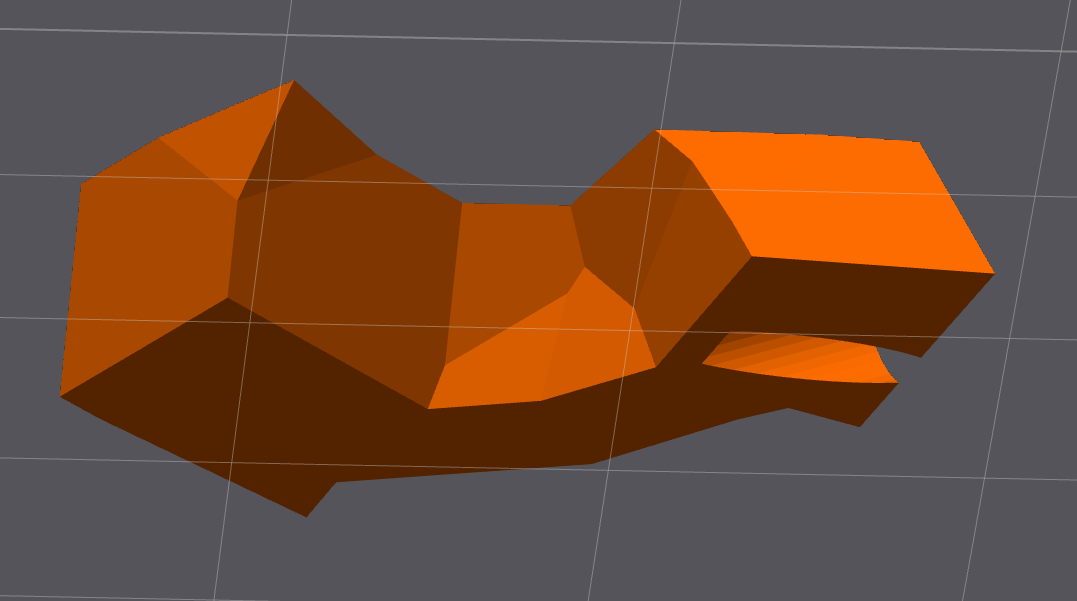
So the thing I was trying to print was this: https://www.thingiverse.com/thing:6365845
Ideally you'd just print it in PLA but I only had one colour PLA so I thought, might as well gather some PETG printing experience :D
The part in question is red_panda_low_poly_V1_-_head_A_red.STL and I tried to print it on an odd angle to make sure that most of the outwards facing walls were on the top, because anything that needed support turned out so hideous.
Also it seems to appear on any side of the model, where you have a slight overhanging angle, in no particular axis :)
I'll print it in pla once my current print is done :D
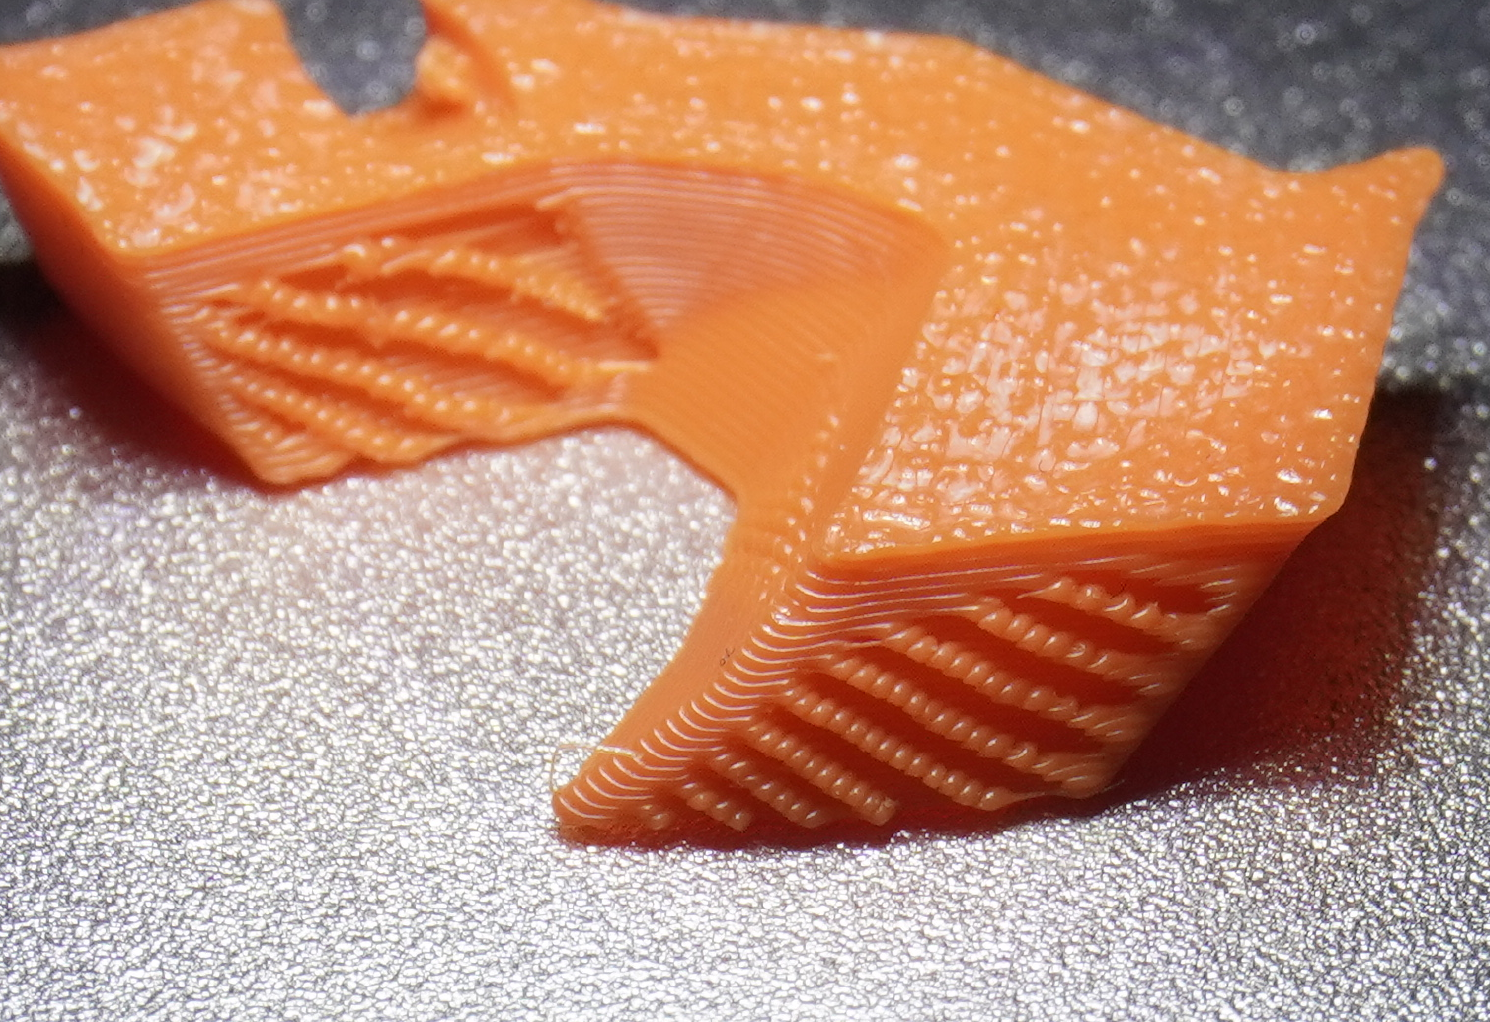
I tried to observe it but it just goes straight over it.. It seems a bit like a cascading issue, where one layer has a bit missing and then the next one blobs onto the next because it's trying to print on nothing, idk
It also sometimes catches itself again and you get these patches of weirdness and then it's okay again
Edit: Setting the max speed for walls to 50 mm/s solved it! I feel like this should be limited when you select the filament, but oh well.
Hey, so I have recently gotten a Bambu A1 and got a roll of PLA and PETG. The PLA is printing very nicely out of the box but the PETG not so much. Since I'm still very much at the beginning of my 3D printing journey, I don't really have a good way of drying my PETG yet, I just stuffed it in a plastic ziplock bag with all the desiccant bags I got from the rolls and printer and stored it that way. I'm already planning to print myself a filament enclosure, I just haven't gotten around to buying the bearings, etc for it.
I've done some functional prints with no angled (overhanging) walls and they have turned out pretty good. When printing on supports the overhangs are ugly af, but no weird pattern like this.
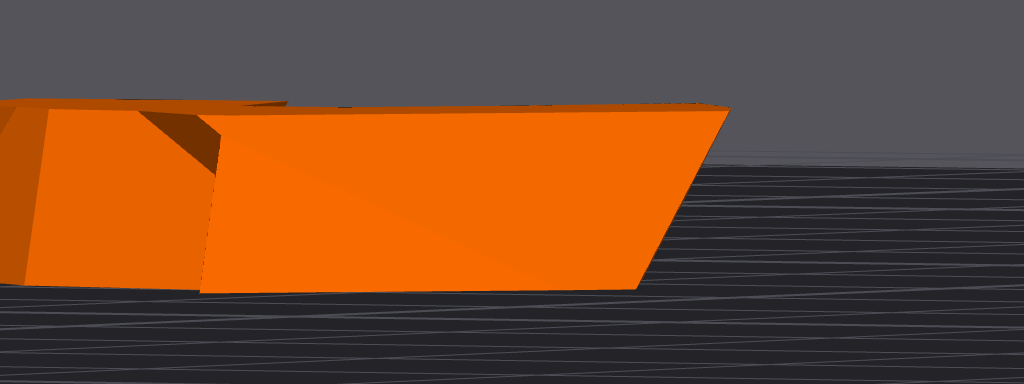
The issue I'm tracking down seems to occur on ~60+° overhangs, that really shouldn't be an issue. I've done a sliced test print and took some photos, any idea what causes this? Thanks :)
Bambu A1, standard 0.4mm nozzle Bambu PETG Basic filament and profile using Bambu Studio Some settings I played around with was flow rate (0.94->0.95) and layer height (0.2mm -> 0.15mm) but it seems to make no difference.
(note, on some of them the part is photographed upside down.) ! ! ! ! ! !
I read it :) I can't seem to get started on stardew.. I planted some stuff and went to bed and then didn't really feel motivated to do more 🤷
Hey, not sure how in depth your linux/docker knowledge is. Please disregard if irrelevant. I would recommend you pick a fixed mountpoint for the drive and set up a systemd service to mount the drive for you (systemd .mount file). Then you add an extra line "RequiredBy=docker.service" (look for systemd RequiredBy) This way the drive always has to be mounted by the system before docker is started and should always be visible before you start a container.
Hope this helps :)
I just finished Deaths Door and it was a very enjoyable game to play on the go or in bed (steamdeck). Took me about 17 hours to finish it.
Glad I took the time to comment ☺️
On Linux I use https://github.com/WoeUSB/WoeUSB to create windows flash drives.. works uhh most of the time? :D In case you hadn't heard of it :)
Honestly my recommendation would be to start off with some microcontrollers/Raspberry Pi and some breadboards and go from there. That way you can uhhh trial and error your way to something that works and worry about the "engineering" part later, when you have gotten your feet wet :D There are some simple Arduino starter kits for example that give you the basic things + a bunch of sensors and motors to play with. I got started myself with the Elegoo Arduino Starter Kit (~50€). Along the way it's probably going to be helpful to look up some course on electronics basics, specifically digital circuits and then analog circuits if you're feeling adventurous.